To safely extinguish a wood fire pit, stop adding wood 30-60 minutes before you plan to finish, then spread out the remaining embers with a metal poker or shovel. Use a garden hose with a spray nozzle to slowly and evenly apply water until all sizzling stops and no steam is visible, stirring the ashes to ensure complete cooling. Alternatively, smother embers with dry sand or dirt, or use a fire snuffer lid to cut off oxygen, leaving it in place for several hours or overnight. Always verify the fire pit is cool to the touch before leaving it unattended.
Understanding Your Wood Fire Pit: Why Safe Extinguishing is Crucial
A wood fire pit, with its natural flames and comforting warmth, brings a unique charm to your yard. Unlike gas fire pits, which can be shut off instantly, wood fires require a methodical approach to extinguish thoroughly. The very nature of burning wood means that even after visible flames die down, deep-seated embers can retain intense heat. These glowing remnants can easily be fanned back to life by a breeze, or transfer heat to combustible materials like dry leaves, grass, or nearby structures, leading to accidental fires. Neglecting proper extinguishing procedures is not just a minor oversight; it’s a direct threat that can result in property damage, severe burns, or even widespread wildfires, particularly in dry conditions. Therefore, mastering the art of safe fire pit extinguishing is as vital as the joy of lighting one.
Essential Steps to Prepare for Extinguishing Your Fire Pit
Before you even think about dousing the last embers, preparation is key to a smooth and safe extinguishing process. A little foresight can prevent a lot of potential hazards, making the cleanup easier and ensuring your fire pit remains in good condition for seasons to come. For outdoor heating buying guides on this site.
Cease Adding Fuel
The first and most crucial step in safely putting out your wood fire pit is to stop adding new wood well in advance. Ideally, you should stop feeding the fire about 30 to 60 minutes before you plan to retire for the night or leave the area. This allows the existing wood to burn down naturally, significantly reducing the amount of active flames and intense heat you’ll have to contend with later. Letting the fire diminish on its own makes the subsequent extinguishing steps much more manageable and effective.
Spread Out Embers
Once the flames have died down, use a long-handled metal poker or shovel to carefully spread out the remaining hot logs and coals. Distribute them across the base of your fire pit rather than leaving them piled up. This action increases the surface area exposed to the cooler air, helping the embers to cool down much faster and more evenly. Breaking up any larger chunks of wood or charcoal also aids in expediting this cooling process, making them less likely to retain dangerous heat.
Gather Your Safety Equipment
|
Our Picks for the Best Fire Pit in 2026
As an Amazon Associate I earn from qualifying purchases.
|
||
| Num | Product | Action |
|---|---|---|
| 1 | HGD 20 Inch Smokeless Firepit with Grill, Portable Wood Burning Fire Pit for Camping & Backyard, Stainless Steel Outdoor Fireplace with Travel Bag, Easy Setup & Compact Storage - Foldable Design |

|
| 2 | CIAYS Smokeless Firepit, 19 Inch Fire Pit for Camping with Patented Technology, Portable Fire Pit for Outside with Steel Grill Rack, Fire Poker, and Bag, Easy Setup and Storage, Wood Burning |
|
| 3 | Fire Pit - 32-Inch Outdoor Wood Burning Firepit with Screen, Poker, and Cover - Outdoor Fire Pits for Backyard, Deck, or Patio by Pure Garden (Black) |
|
| 4 | Kingson 26" Outdoor Fire Pit with Grill & Mesh Cover, Wood Burning Steel Firepit with Poker & Star Spark Screen, Heavy Duty Patio Fire Bowl for Backyard, Camping & Garden |
|
| 5 | BALI OUTDOORS Fire Pit with Poker, 32 inch Outdoor Fire Pit Patio, Wood Burning Firepits for Outside with Grill |
|
| 6 | Wisteria Lane 3 in 1 43" Extra Large Fire Pit for Outside Wood Burning with 2 Adjustable Grills, Outdoor Fireplace with Lid and Fire Poker, BBQ & Bonfire & Round Metal Table for Patio, Backyard |
|
| 7 | SINGLYFIRE 36 Inch Fire Pits for Outside Large Outdoor Wood Burning Crossweave firepit Heavy Duty Steel Bronze Bonfire Pit for Patio Backyard Garden with BBQ Grate,Spark Screen,Log Grate,Poker |
|
| 8 | Fire Pit - 32-Inch Outdoor Wood Burning Firepit with Screen, Poker, and Cover - Outdoor Fire Pits for Backyard, Deck, or Patio by Pure Garden (Black) |
|
| 9 | Fire Beauty 26" Steel Fire Pit with Grill & Diamond Mesh Design,360° Airflow Tech for 80% Less Smoke,XL Flames,Heavy-Duty Portable Outdoor Fire Bowl for Camping, Backyard, Beach (22lbs, 4 Handles) |
|
| 10 | Fire Beauty Fire Pit for Outside Wood Burning,BBQ Grill Steel Fire Bowl with Spark Screen Cover,Log Grate,Poker for Camping Beach Bonfire Picnic Backyard Garden |
|
Being prepared with the right tools ensures you can extinguish your fire pit effectively and safely. Always have a water source readily available, such as a garden hose with a spray nozzle or several large buckets of water. A metal shovel and a long-handled poker are indispensable for stirring and spreading embers. A metal ash bucket with a lid should be on hand for safe ash disposal, and for emergencies, a Class A fire extinguisher is a wise investment, though rarely needed for a controlled fire pit.
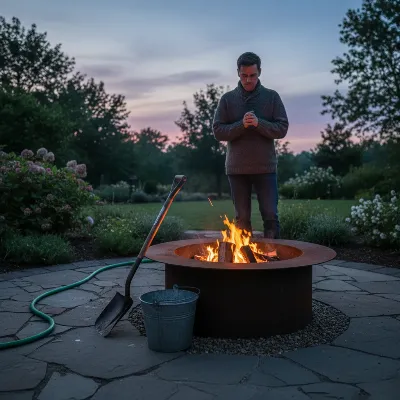 Person preparing to extinguish a fire pit, with a hose, shovel, and bucket nearby
Comparing Methods for Safe Fire Pit Extinguishment
There are several reliable methods for extinguishing a wood fire pit, each with its own advantages and considerations. Understanding these options will help you choose the best approach for your specific situation, ensuring safety and minimizing potential damage to your fire pit.
| Method | Pros | Cons | Best Use Cases |
|---|---|---|---|
| Water | Quick, highly effective at cooling, readily available | Can create dangerous steam, thermal shock may damage some metal or ceramic fire pits, can cause rust | Quick extinguishment, readily available water, emergencies |
| Sand/Dirt | Smothers fire by cutting off oxygen, no thermal shock, prevents rust on metal pits | Not as quick to cool as water, requires stirring to be effective, can be messy, harder to clean out | When water is scarce, protecting metal fire pits, camping |
| Fire Snuffer | Cuts off oxygen completely, protects from rain/elements, convenient lid | Requires specific fire pit shape, less effective for open designs, doesn’t actively cool embers, can be hot to handle | Enclosed fire pits, daily use for convenience, preventing ember escape |
The Water Method
Using water is often the quickest and most effective way to extinguish a fire pit, as it rapidly cools the embers and smothers the fire. However, it must be done with caution to prevent steam burns and potential damage to your fire pit.
The Sand or Dirt Method
For those who prefer not to use water, especially with metal fire pits prone to rust or in areas where water is scarce, dry sand or dirt is an excellent alternative. This method works by smothering the embers, cutting off their oxygen supply.
The Fire Snuffer Method
A fire snuffer is a specialized metal lid designed to fit snugly over your fire pit, effectively cutting off the oxygen supply and smothering the flames and embers. This is a highly convenient method for many fire pit owners.
> “Always patience is a virtue when extinguishing a fire pit. Give the embers time to cool down naturally as much as possible before introducing water or sand. This reduces risks and makes the process more efficient.” – Alex Stone, Certified Fire Safety Expert
Recommended Tools for Safe Fire Pit Extinguishing
Having the right equipment on hand makes the task of safely extinguishing your fire pit much easier and more secure. These tools are not just convenient; they are essential for responsible fire pit ownership.
Fire Pit Shovel and Poker
A sturdy metal shovel and a long-handled poker are your primary tools for managing and extinguishing a fire pit. The poker allows you to safely adjust logs, break apart larger embers, and stir the contents of the pit from a safe distance. The shovel is crucial for spreading out coals, applying sand or dirt, and later, for scooping out cooled ashes for disposal. Look for tools with heat-resistant handles for added safety.
Water Source (Hose/Buckets)
An accessible water source is non-negotiable for fire pit safety. A garden hose with a multi-pattern spray nozzle allows for controlled and gentle application of water, minimizing steam and splashing. Alternatively, keeping several large buckets of water nearby provides a readily available supply for dousing embers or addressing any stray sparks.
Fire Pit Snuffer/Lid
Many modern fire pits come with a custom-fit snuffer or lid. This accessory is designed to completely cover the fire pit, effectively starving the fire of oxygen. Beyond extinguishing, a snuffer also protects the pit from rain and keeps children or pets away from cooling embers. Ensure your snuffer fits tightly to be most effective.
Metal Ash Bucket & Fire Extinguisher
A dedicated metal ash bucket with a tight-fitting lid is crucial for safe ash disposal. Never use plastic or cardboard containers for ashes, as even seemingly cool ashes can contain hidden embers that could ignite flammable materials. For emergency situations, having a Class A fire extinguisher specifically rated for ordinary combustibles (like wood) is a critical backup. Position it clearly visible and easily accessible near your fire pit area.
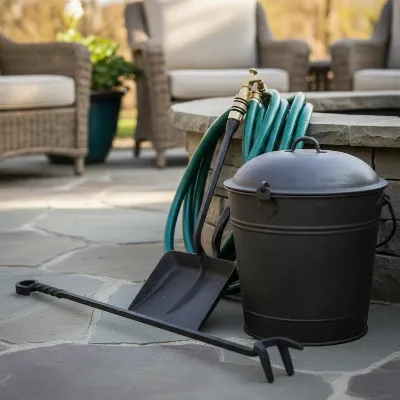 Essential tools for safely extinguishing a wood fire pit, including a shovel, poker, hose, and metal bucket
Your Comprehensive Guide to Extinguishing a Wood Fire Pit Safely
Putting out a fire pit isn’t a race; it’s a careful, deliberate process. Here’s how to do it step-by-step using different common methods.
Step-by-Step Water Extinguishment
- Stop adding fuel: As noted earlier, stop adding wood at least an hour before you plan to extinguish.
- Let it burn down: Allow the fire to burn down to a bed of glowing embers and ash. Use your poker to spread out any larger pieces to accelerate cooling.
- Apply water slowly: Using a garden hose with a spray nozzle (set to a gentle shower or spray) or a watering can, slowly and evenly apply water over all the embers and ashes. Avoid a direct, powerful stream, as this can kick up hot ash and create excessive, dangerous steam.
- Listen and observe: You’ll hear sizzling and see steam. Stand back to avoid steam burns. Continue pouring water until all sizzling stops and no more steam is visible.
- Stir and re-douse: Use your metal shovel or poker to thoroughly stir the wet ashes and embers. This ensures water penetrates all layers, extinguishing any hidden hot spots. Repeat the dousing and stirring until the entire mixture is a cool, wet slurry, like mud.
Step-by-Step Sand/Dirt Extinguishment
- Stop adding fuel: Again, allow the fire to die down to embers by not adding new wood for about an hour.
- Spread embers: Use a poker or shovel to spread out the remaining embers evenly across the fire pit’s base.
- Apply dry sand/dirt: Carefully scoop dry sand or dirt (ensure it’s completely dry to avoid creating steam) onto the embers using your shovel. Cover all visible hot spots.
- Smother and stir: Use your shovel or poker to stir the sand/dirt into the ashes and embers. This action helps to completely smother the fire by depriving it of oxygen. Continue stirring until you are certain all glowing embers are covered and no heat can be felt.
- Check for coolness: While sand helps smother, it doesn’t cool as quickly as water. Wait a significant period before attempting to check for coolness.
Using a Snuffer for Oxygen Deprivation
- Stop adding fuel: Let the fire burn down significantly, ideally to just embers, by not adding more wood for at least an hour.
- Ensure a good fit: Place the snuffer securely over the fire pit, ensuring it creates a tight seal. This will cut off the oxygen supply, causing the fire to extinguish.
- Leave it in place: Do not remove the snuffer too soon. Leave it on for several hours, or even overnight, to allow the embers to completely cool and burn out due to lack of oxygen.
- Verify coolness: Once you remove the snuffer, carefully check the fire pit for any remaining heat before considering it safe.
Post-Extinguishment Safety & Ash Disposal
Successfully extinguishing the fire is only half the battle. The next crucial steps involve verifying the pit is truly cool and safely disposing of the ashes to prevent any lingering hazards.
After using any method, it is paramount to verify complete cooling. Even if the ashes appear black and lifeless, they can still harbor significant heat. Gently place the back of your hand just above the ashes. If you feel any warmth, the fire is still active. Continue dousing and stirring, or leave the snuffer on longer, until the entire fire pit, including the base and surrounding ground, is cool to the touch. An infrared thermometer can provide an extra layer of assurance. Never leave a fire pit unattended if there is any doubt about its coolness.
Once the ashes are completely cool—which can take several hours or even days, depending on the fire’s intensity and ambient conditions—they can be safely disposed of. Carefully scoop the ashes into a metal ash bucket with a tight-fitting lid. Store this bucket outdoors, at least 10 feet away from any combustible materials, structures, decks, or wood piles. Never dispose of ashes in plastic bags, cardboard boxes, or directly into a garbage can, as dormant embers can easily reignite. Some people choose to reuse their cooled wood ashes in gardens or compost, but always ensure they are fully cooled before any repurposing. Regular cleaning of your fire pit after each use also helps maintain its longevity and prevents excessive ash build-up, which can trap heat.
Conclusion
The allure of a wood fire pit is undeniable, offering warmth, light, and a focal point for outdoor living. However, the responsibility of safely extinguishing it is a task that should never be underestimated. By embracing a methodical approach—stopping fuel early, spreading embers, and then carefully applying water, sand, or a snuffer—you can ensure that your backyard haven remains a source of joy, not a hazard. The critical importance of verifying coolness before leaving the area and disposing of ashes responsibly. Prioritizing safety through every stage of your fire pit experience not only protects your property and loved ones but also preserves the cherished moments created around a safe and well-managed flame. So, as the last embers fade, take pride in the knowledge that you’ve mastered the art of fire pit safety, allowing you to relax and truly enjoy your outdoor retreat. What other fire pit safety questions do you have?

I used to just let my fire pit burn down, but after reading about spreading out the embers, it makes so much more sense. The garden hose method with the spray nozzle worked perfectly last night. It was surprisingly quick to get everything cooled down and I felt much safer leaving it.
I’ve always just used water, but the tip about stirring the ashes to ensure complete cooling was a game-changer. I never thought of that! It really helped make sure there were no hidden hot spots. Definitely a good reminder for anyone with a wood fire pit.
The advice about stopping adding wood 30-60 minutes beforehand is solid, but I found the fire snuffer lid took a lot longer than ‘several hours’ to really cool everything down. I had to leave it overnight and even then, I was a bit nervous. Maybe my pit is just bigger.
We just got a new fire pit and I was a little overwhelmed with how to properly put it out. The suggestion to use dry sand or dirt to smother the embers was exactly what I needed. It’s so simple and effective, and I don’t have to worry about making a muddy mess.